Thursday, July 14, 2016

Hard to believe over a year has went by since my last entry.  Work takes a lot of my time and even more of my energy, leaving the trainroom to play second- or even third-fiddle in my life.  I have been in there from time to time to do some things so it hasn't been completely inactive.

One thing I did was remove the track on one of my modules due to an elevation issue.  When we moved last year, a well-intentioned helper banged up one of my modules, leaving it somewhat uneven.  As a result, there was a noticable difference in height between the two causing the track to need to climb a grade between them.  I decided to remove the track and cover this module with a thin layer of craft cork to bring it closer to the same height.  I haven't relaid the track here yet because I want to make sure I'm happy with the module connection and also want to make sure I'm happy with the layout of the industries.

I have recently decided to extend the layout around to the third and final wall in my train room.  The fourth wall is a double-door closet and I don't want to block that, but this will be more than enough to keep me busy for a long time (at my pace).  The new dimensions of the layout are 9.5' (16" deep) X 11' (6"-9" deep for much of it) X 8' (12" deep).  I finished the final sections this week.

I've slightly altered my modeled location as well.  Very slightly.  :-)  Before, I had created a fictional branch of the Santa Fe that was spun off in the last decade.  That line was in the Tolleson area west of downtown Phoenix.  However, in looking at the prototype in Google Earth and going back in the historical images, I found a prototype spur that fit my goals well and allowed me to basically model mostly real track.  My line now is based on the ex-SP spur running due south from behind Chase Field in Phoenix.  Currently the wye off the UP line only heads south a short distance for turning equipment, but it used to extend south and east for a few miles.  I will model it as if it was acquired by my WestRail Group and run it south from just below the wye to just south of Interstate 17, approximately 1.25 miles or so.  There it will meet up at the Sunland Industrial Park with an ex-Santa Fe spur (all fictitious) that has been severed by development, allowing me to stick with my premise of dual access to the BNSF and UP for customers.

This week, after finishing the additional modules, I decided it might be fun to see how the real world works on my modeled version.  I started by copying and pasting images from Google Earth into Word and then sizing them using the ruler so that when I printed them they'd be the appropriate size.  I did much of the modeled portion of the line this way, then had them printed out at Office Depot.  I cut these out to 12" widths and 6" widths (depending on the section) and taped them together on my benchwork to-scale.  It actually looks pretty cool to see the real world, though in black and white and very flat.  haha  I set my flex track on the actual right-of-way and put a train out along with a few other items just to get a feel for how it'd look.  I wish I could just water the images and have them grow into the models as I can see there's a lot to do!

I am going to remove the track of my former runaround staging, which is on a 6" wide section, and relay it to better match the printouts.  Finally, I now have a much better feel for where the track runs under the freeway and how much space that will take.  It will be a great transition into my industrial park section though.
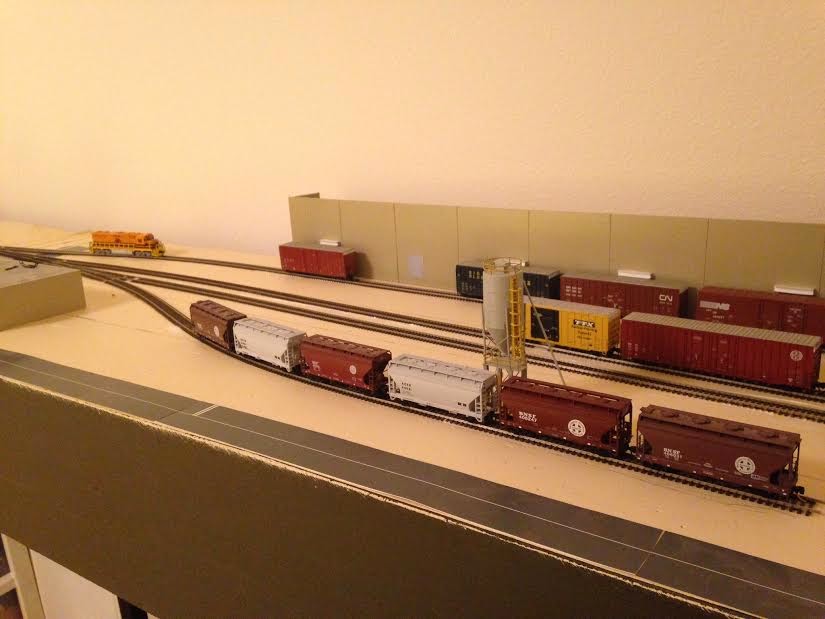
I'll leave it at that, but post some images below showing what the printouts look like on my benchwork.  Hopefully more to come in the not-too-distant future.  :-)

-Dave

Image 1:  Looking south from the UP wye (not modeled).  Chase Field would be right behind where I'm standing.


Image 2:  Overhead shot of the same location.


Image 3:  Sideview


Image 4:  Sideview


Image 5:  Underneath this is my runaround that used to represent the UP interchange.  I will pull that up and relay it as a siding that used to be here in real life.  That will be my transload track.


Image 6:  Heading south under Interstate 17.


Image 7:  Heading south out from under Interstate 17.  The real track used to extend straight, leading into some spurs and so forth.  My track will curve to the right representing my fictitious industrial park and ex-Santa Fe track.


Image 8:  Modeled Route

Modeled line is in Red (all ex-SP except for the short segment at the end under I-17 that is fictional ex-ATSF).

Orange is a fictional ex-ATSF spur

Yellow is ex-SP (abandoned)


Monday, March 16, 2015

Well, after a somewhat long period of anticipation, my two home road units and caboose arrived in the mail today from Kendall at The Blue Caboose custom painting service.  I must say, while I liked the pictures that he had sent me previously, I actually LOVE the way the units look in person.  They are a deeper color than I first thought and look the part much better than I'd hoped.


Both of the GP38's have RC antenna stands on the cab that Kendall installed for me.  These units are numbered to reflect being part of a larger fleet of probably 12-15 units in the WestRail fleet.

The caboose looks great as well but I think I need to remove the running boards and trim the ladders to just the roofline.  Otherwise, I'm thrilled with this "shoving platform" as well.

I think it is very ironic that the units arrived the day after I installed my track.  I ordered these over two years ago and so the timing is pretty interesting.  I guess he knew better than me when I'd be needing them.  :-)

One total sidenote, and quite a bummer, is that the switch from the main to the stub end siding in the last picture above (with the grey hopper leading) somehow got Liquid Nailed shut.  I tried to be super careful not to get the adhesive under the moving parts of the switches but this one got messed up. When I tried to "loosen it up" to see if it would throw, I ended up breaking a key piece off.  Ugh.  I'm going to have to somehow pry up the track and put in a new switch (if I have one - haven't looked) but I can still serve everything but the transload yard so it's not a total disaster.

I'm going to try to get it wired up this week and break out the PowerCab and see how things go.  :-)


We finished our move to a new home and I have finally gotten back to trying work on my railroad.  It'll be altered from the plans at the previous home but I think ultimately it will be simpler to build and operate.  Not a bad thing.

My premise stays the same for the line, except that now instead of including the UP (ex-SP) main east out of Phoenix, along with an interchange "yard", I'm simply going to represent the interchange with a runaround track and 0-5-0 staging.  I'll set up the day's interchange from the UP on the runaround track, then pull my train up the "main", uncouple the units, pull ahead, then reverse onto the interchange cut and proceed down the line for the day's switching.

I got the track pretty much laid today, though the switches are floating for now and there is one spot where two modules connect that are uneven due to getting beat up during our move.  I will need to put some shims under the track there.  Otherwise, I am ready to connect some power and see how everything works

One note:  My track isn't perfectly straight.  Some of that, such as a bit of a dogleg mid-layout, is by design, but some of it is just because my viewing angles will make it fairly inconsequential.

My new layout is 9.5' (16" wide) X 7.5' (6" wide - staging).  I could probably extend the staging end around to a third wall, but I'm not really interested in doing that right now.  Maybe in a few years.  For now, just getting trains running will be a great start.

Pic 1:  Looking at the interchange/staging tracks from the end of the layout.  The wye switch in the foreground is the last piece of track and represents the wye leading to the UP line.


Pic 2:  Side view of interchange.  


Pic 3:  Overview of the Sunland Industrial Park 


Pics 4 and 5:  Offset view.  Other than the track, everything is just mock-ups or just sitting in place.  


Pics 6 and 7:  Advanced Drainage Systems (ADS)


Pic 8:  Maricopa Beverage or possibly another business


Pics 9 and 10:  Looking towards Sunland Foods and the transload area


Pics 11-13:  The transload track is in the foreground.  Behind it is the "main" which will continue another mile or so in my imagination but will stop behind the office.  Next is a stub-end set out track used for cars holding for spots.  Finally, in the rear is Sunland Foods.  


Pic 14:  This is the corner that connects the interchange/staging track on the left with the industrial park setting on the right.  I'll ultimately put a viewblock of some sort in to block the sharp curve view.  Probably either an overpass or warehouse.  


I'm always behind at work and go through spurts, so we'll see where I get this time around.  :-)

-Dave


Tuesday, April 15, 2014

A recent trip to Phoenix allowed me to get some additional photos of the area that I'll be modeling.  While I'm not going for "exact", I am trying to get the feel for the area and hopefully the pictures and videos that I captured will give me some inspiration. 

First, a few shots of the mountains to the south of my line.  My hope is to use a combination of these shots (probably 7 or 8 in total) to stitch together, edit, and create a seamless photo backdrop for parts of my line. 


When you first enter the train room, you will be greeted with a scene directly to your left that is fairly narrow and exposed.  This will represent a four lane street crossing of the UP (ex-SP) former mainline running east-west.  The street I'm looking at using as a reference is 99th St. in Tolleson.  The picture below shows the current under-construction view looking "north" down 99th St. as it crosses the UP line (the door is just past the foam). 


Below are a few pictures taken while in Phoenix of this same crossing, also looking north. 


And looking down the line in either direction.  First, to the west (left), which would be the extension that will stick out into my room about 26".


The line is still signaled so I'll have to get the one shown above onto the layout.  I'd likely just have it set to one color (I'm guessing green) because it really will only be for looks.  Love the palm trees!

And then looking east. 


On my layout, the photo below is taken looking the same direction at the same crossing.  I will have a couple of extra tracks to the left of the above passing siding that will together represent the UP/SLTR interchange.  Just past the siding switch, the SLTR will diverge to the right and head south into the industrial area that they call home.  Just before the siding switch (and just after the 99th St. crossing) is the switch serving Maricopa Beverage.


Hopefully that gives a little more of a glimpse into what I hope to eventually recreate on this layout.  It will be a little challenging modeling the openness of the area when the layout is up against walls.  I'm hopeful that the backdrop will help convey the scene.

Thanks for reading along!

-Dave


Sunday, April 13, 2014

One thing I'm going to need is a number of warehouse structures on my layout.  For the most part they can be shallow relief/backdrop style buildings, so nothing too elaborate.  I have one of the Nu-Line warehouse's that I've never assembled, so I thought about cutting it in half basically in order to make two separate buildings.  However, only one side is really suitable for receiving boxcars of product so while I might still do that, I'm going to wait and see what my exact needs are.

In the interim, I decided to build a temporary structure to see how it would look, fit, etc.  I didn't want to spend money on this so I looked around to see what I could use.  I manage a local quick service restaurant and I sometimes will grab old menu panels and other marketing materials - free stuff, basically.  You never know what you can do with it, right? 

Anyhow, I grabbed a small menu panel that was no longer used that was made of a thick almost Masonite-like material.  I figured that'd be a good starting point.


I used the Nu-Line warehouse wall as a template to size up this structure.  I then used some stiff foam backing that was on another sign to help frame up the backside. 


It was a pretty easy build, really, though due to a couple of break-ins last year I was temporarily down to just a Ginzu II knife that was purchased years ago at the state fair.  Oye.  Nonetheless, not only can it slice open a soda can then slice a tomato, it can also do a lot in the train room (to my wife's chagrin). Anyhow, I scored the sides with the Ginzu knife, giving it the segmented look like the Nu-Line structure. 

I topped it with a simple piece of black foamboard purchased at the dollar store, then painted it a basic tan color.


It's hard to tell from the photo but I purposely made the left end about 1" or so shallower than the right end to put it at an angle.  I was taking inspiration from a structure locally in Tacoma that sits at an angle to the branch passing by and thought it added a little interest. 

For the doors I simply Googled pictures of warehouse doors and then printed them out into a size that seemed to scale out appropriately.  They are just glue-sticked on for now.  I would have cut a hole for each but doing that with the serrated Ginzu knife seemed like an insane proposition.  This works fine.  :-)

Finally, I used a piece of some sort of hard plastic from an exterior marketing panel to create overhangs for the doors.  I don't really like them so will replace them when I get the gumption, but for now they serve the purpose, including helping me position a boxcar centered on the door. 


The black thing above the center door is a peel and stick number that I think came with some Atlas track components at some point - can't remember now.  Anyhow, I was seeing if numbering each door would look good.  I'll do it, but won't use these. 

When the time comes and I'm happy with the location of the warehouse, I might do a little more to it to make it more complete looking until such time as I decide to replace it.  Frankly, unless you stare at it, it doesn't seem like it will stand out as "poor" for my purposes.  If nothing else, it get's me started with an industry that I can serve.

Right now I'm planning to use it for a food manufacturer similar to one outlined by Lance Mindheim in a recent MR issue.  I have a set of silos (also from Elvin Howland) that I'll position at the right end.  The will receive plastic pellets on an adjacent track, along with a vegetable oil tank car (which was recently crushed by the mirror in an earlier post, which somehow managed to fall over on my yard even though the tacks holding it remained in place??).  It should make a nice industry to model.

Thanks for reading along!

-Dave


Saturday, April 12, 2014

I just wanted to post a quick ... um, trackplan.  Not really much more than pretty colored lines in a notepad, but I don't have any other tools at this time to do much more.  The track that runs left to right out onto the extension is the UP (ex-SP) main. 


You can get a basic idea, though, of what I'm planning for phase one.  A few notes:
  • Not to scale!  lol
  • The disconnected track at the lower left - if installed - would represent a UP spur that was displaced by the interchange yard construction.  It would, in reality, be a way for me to have a warehouse along that left wall that might provide a view block for the mirror at the end of the yard as well as give me a place to park my BLMA reefer's that I'm not sure I'll need on this layout.
  • The crossing at the lower center would be what would greet people first entering the room.  I plan to utilize NJ International crossing signals and make it a scale width for a four lane road with a center island, similar to crossings in that area.
  • At the top right, the track that curves would lead to phase two on the adjacent wall. 
  • The UP (ex-M&P) spur will cross the SLTR just to the right of the road at the top center of the map.  It will be basically an Atlas code 55 90 deg crossing with the track running off the layout immediately to either direction. 
Not much else to say other than that.  Comments welcome. 

-Dave

My plan all along (after ripping out most of my original around-the-room benchwork) was to build individual modules so that the room could easily be repurposed as needed.  We've hosted several exchange students for 2-3 weeks at a time and this room is where someone would stay.  In preparation for just such an event, I decided to dismantle my under-construction freelanced Olympia & Southern Railroad, based on the actual TacomaRail Olympia branch.  We didn't end up hosting so I didn't complete the demolition, leaving one U-shaped 3'x5' section in the former closet. 

The new plan meant constructing the modules and then connecting them temporarily with bolts, which sounded like a good plan.  Below is a pic of the first two modules, each 16"x48".


They were just basic construction with a 1" layer of foam on top.  I bolted them together and then painted them in a sage color similar to one recommended by Lance Mindheim. 


I had the shelf at the bottom so that I could put all of my storage items underneath. 


Then added some black cloth skirting that was from my original layout some years back (but never completed - that's my usual m.o.).


My plan was to also construct the closet area modules but ended up not having enough wood.  I hadn't yet ripped out the old layout section here so I decided to retain it and just attach these modules to it.  It was a few inches wider and not completely perpendicular to the wall at the connection point, so butting the modules up to it left them at a slight angle to the wall they were against.  Not enough to be a problem but not perfect. 

This view looks towards the closet area and the existing benchwork, which I completed with a taller fascia to account for the difference in height and the thickness of the old roadbed, which included 2" foam. 


The industry in the foreground was originally going to be Hancor Plasctics (aka Advanced Drainage Systems, Inc) in Belmore, WA on my last layout.  I had Elvin at Layout Concepts custom make the silo combo to match it, but never got to finish the layout.  I've decided to use the same industry but place it in Phoenix on my new line.  This is just getting a feel for things.  The hoppers are on the spur feeding the facility while the freight cars to the right are on the SLTR's "main", with us looking north. 

The blue foam is the start of the old benchwork.  To the far left will be the interchange yard with the Union Pacific.  Beginning at the blue foam I'll need to drop in elevation by about 1 1/4", which I'm bummed about because the area is so flat, but will live with anyhow.  I could have chosen to build up the old benchwork with additional foam but I didn't want almost 4" of foam and the requisite deep fascia to go with it. 

Aside from the elevation difference between benchwork, I made two other compromises with the layout plan that I **hope** will not be too operationally limiting or frustrating.  One was that I decided to orientate the interchange yard parallel to the rest of the layout, which meant that there was less than 4' of space to have a train swing onto the UP main, clear the switch to the yard, then back in.  This would require that the yard be fairly short (and stub ended), and would require a lead sticking out into the room either permanently or as a swing-up/down type of affair.

Ultimately I decided to make it the extension for the yard lead/UP main permanent, extending about 26" out into the middle of the room, parallel to the main benchwork as well as the door entry.  While not ideal, at one time I had filled this roughly 10'x10' bedroom with an around the walls layout including a center peninsula, with just 18" aisles.  I share this room with my wife's crafts/gift items as well as some of my daughters stuff (and turtle) so it was an inconvenience to say the least.  This extension won't be perfect but it shouldn't interfere much with their use of the space. 


In the picture above, a train has pulled onto the UP main heading west off of the SLTR "main", and is preparing to back into the interchange yard, which will be to rear left of the train.  As you can see, the wall isn't very far away so the yard tracks will be quite short. 

Because I don't want it to look like a stub end yard, I plan to put a mirror of some sort at the end against the wall, giving the impression that the line continues on into the distance.  As I lay track and start mocking things up a bit, I'm getting a feel as to how this will work.


The picture above shows a head-on view from the end of the extension.  You can see where I've positioned an old mirror against the wall to make it look like the trains go off into the distance.  When finished, I think it will be effective enough for me in at least eliminating the dead-end look.  I'll probably choose a smaller mirror and try to block the right half with a building or something in order to make it less conspicuous. 

In the photo above, you can see mostly just mocked-up items.  The train is swinging onto the UP (ex-SP) main in Tolleson.  It will pull clear of the west yard switch, then back into the unfinished yard to set out its train.  It will then pick up the UP interchange and reverse back onto it's own line and head south.  To the right is the planned Maricopa Beverage siding, based on the Columbia Beverage siding in Tumwater, WA.  It basically consists of a single track with room for a tanker to pull alongside and pump out what it needs.  The building will actually be for a trucking company that shares the space. 

Well, that gives more of an overview.  I'll probably try to post some more ideas soon.

-Dave